If you run a WordPress site which uses a lot of (HD) images, you will probably be interested in this piece to reduce the load on your WordPress server.
Recently I saw that my WordPress Simple Hosting space at Gandi was nearing full capacity (22 GB out of 30 GB!). This wasn’t due to my own site’s database (max 1GB) but to my daughter’s photos storage.
She’s a talented photographer and uploads a lot of hi-resolution pictures to her personal site. A few months ago I gave her access to an Amazon S3 bucket to upload her pictures (and then use the direct file URLs on her WordPress site) but the procedure wasn’t very user-friendly and not always successful. So I decided to find a better way for her to host WordPress images on Amazon S3, to avoid reaching full capacity on the server hosting the site itself.
I came across WP Offload Media Lite which does the job perfectly. It’s free for uploads of new media. We would need to pay if we wanted to offload existing media to S3. But it won’t be necessary for our use case.
CREATE A BUCKET ON AMAZON S3
The first thing to do obviously is to create a bucket on Amazon S3 to host the images. With a public access policy, like this one (replace the text in bold with your own bucket name).
{
"Version": "2012-10-17",
"Statement": [
{
"Sid": "AddPerm",
"Effect": "Allow",
"Principal": "*",
"Action": "s3:GetObject",
"Resource": "arn:aws:s3:::bucketname/*"
}
]
}
After applying this policy via the PERMISSIONS section of the S3 bucket you should see a PUBLIC tag on an orange background in the ACCESS column.

GENERATE USER CREDENTIALS
Then you need to create a policy granting access to that specific bucket before creating a user group and a user enjoying the access to the bucket (which you’ll need for the setup of the plugin on WordPress).
The best way to do it (to avoid giving access to the whole S3 instance) is to follow the instructions on this page.
Then you’ll open the user’s profile on Amazon via SECURITY CREDENTIALS to generate the ACCESS KEY ID and SECRET ACCESS KEYS.

You will need to either type in these credentials in the plugin settings in your WordPress admin or add a piece of code incl. these credentials to your wp-config file (using ftp). This will activate the connection between the media library of your WordPress site and the Amazon S3 bucket. WP Offload Media offers a quick start guide which details all the procedure.
CREATE A CLOUDFRONT CDN DISTRIBUTION
Instead of having long Amazong S3 URLs for each of your image files you might prefer to use a custom domain (like img.yourdomain.com) to serve the images. You can either do it by declaring a CNAME in the DNS settings of your domain connecting directly the S3 bucket to a specific custom domain OR, much better, create a CLOUDFRONT CDN distribution attached to your Amazon S3 bucket, which will optimize the distribution of your images. And then declare a CNAME with the Cloufront URL to attach your custom domain to the Cloudfront distribution.
It’s very easy to create a Cloudfront distribution using as origin a Amazon S3 bucket. WP Offload Media explains the procedure in details.
GENERATE A SSL CERTIFICATE
If you want to go the extra mile and serve your images via https, you just have to generate a free SSL certificate using AWS Certificate Manager. Ideally before the creation of your Cloudfront distribution (that way you want need another deployment). In their tutorial, WP Offload Media says that you should create a bucket in USA East / N. Virginia to use a AWS SSL Certificate. This used to be the case, but not any more. I’ve successfully created SSL Certificate for buckets hosted in the EU.
It will take a while to complete the deployment of the Cloudfront distribution but you don’t have to wait for the end of the procedure to connect the Cloudfront URL via a CNAME to your custom domain (if required by your registrar, do not forget the DOT at the end of the Cloudfront URL when declaring your CNAME).
You can check the propagation of the CNAME using WhatsmyDNS.net.
DECLARE YOUR CUSTOM DOMAIN IN THE PLUGIN SETTINGS
When the propagation will be completed, just type in your own custom domain via your WordPress admin in the WP Offload Media plugin settings.
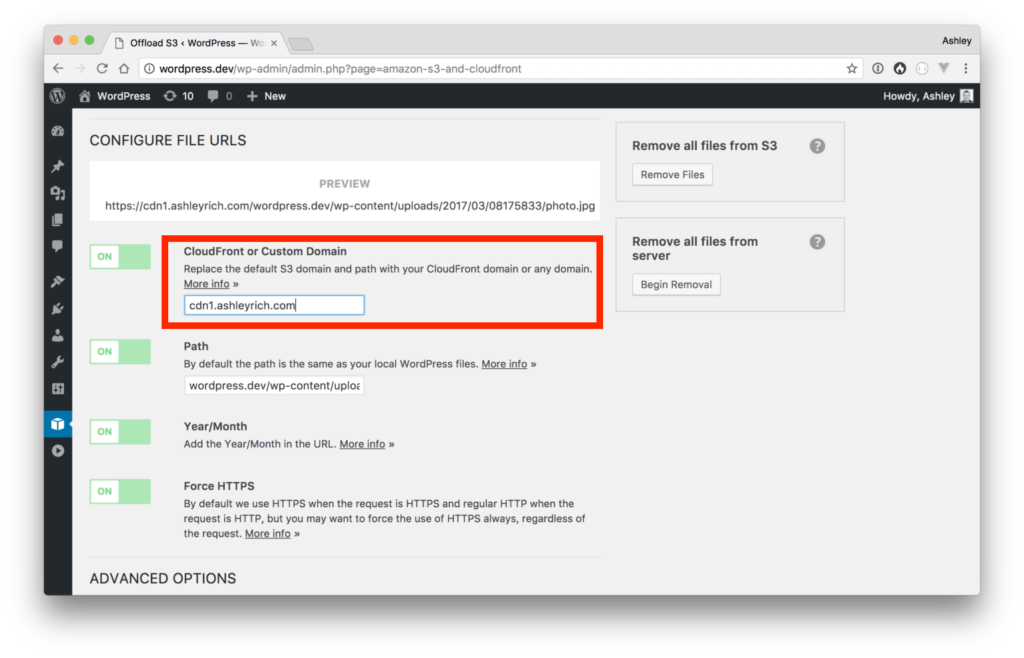
All your new images will be uploaded to Amazon S3 and will be accessible via your custom domain URL (followed by wp-content/uploads/year/month/date/image_name).
If you have any additional questions, don’t hesitate to leave a comment below.

 Subscribe to my weekly newsletter packed with tips & tricks around AI, SEO, coding and smart automations