BREAKING NEWS: There is now an official API for ChatGPT. You can follow the steps in this tutorial and replace the call to GPT-3 by a call to the ChatGPT API.
ChatGPT is all the rage. Everyone has started using the conversation AI interface released in November 2022 by OpenAI.
While it provides a great UI for casual one-off conversations, it’s not the ideal environment if you want to process data in bulk.
You can of course try to develop some form of browser automation but it’s not reliable and, if you’ve been frequently using ChatGPT, you’ve noticed that answers tend to be slow, with a capped daily volume per user.
It’s much better to connect directly to the OpenAI API via Python. In my article for Python beginners, I explained various ways to use Python on your Mac. You can either use it locally or in the cloud, via Google Colab or Kaggle.
I have developed some Python scripts connected to OpenAI in PyCharm but for a recent project, I needed to share my code with a collaborator.
I first started to transpose my script into a Google Colab notebook. It worked fine but this morning, after leaving the notebook idle for a few hours, I noticed that my creds.json file used to connect my script to Google Sheets had disappeared from the side panel.
And when I tried to run the import commands in the first cell of my Google Colab notebook, I got an error. The packages (openai and gspread) had also been removed from my Google Colab instance.
👉 Here’s the explanation: when using Google Colab, any files you upload will not be permanently available. Colab is a temporary environment that has a 90-minute idle timeout and a 12-hour absolute timeout. This means that if the runtime remains idle for 90 minutes, or has been active for 12 hours, it will disconnect. When this happens, all variables, states, installed packages, and files will be lost and a new, clean environment will be created upon reconnection.
How to work with persistent files and packages in a hosted Jupyter notebook?
Fortunately there’s a way to keep persistent files AND packages in a hosted Jupyter Notebook: you can do it with Kaggle notebooks!
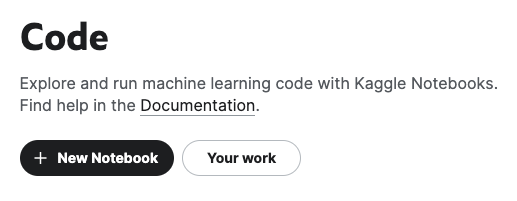
In the Settings side panel, you have the option to make your variables and files persistent.
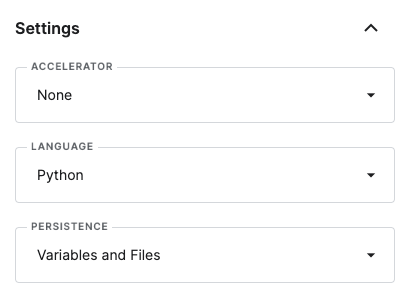
You could install your packages via a quick ! pip install command in the first cell of your Notebook but those packages would not be persistent. In order to have them forever at your disposal, you need to go the extra mile with a more sophisticated command.
!pip install openai --target=/kaggle/working/mysitepackagesThis will install openai and the required dependencies under mysitepackages in the side panel. It takes a little while but all those packages will then be persistent.
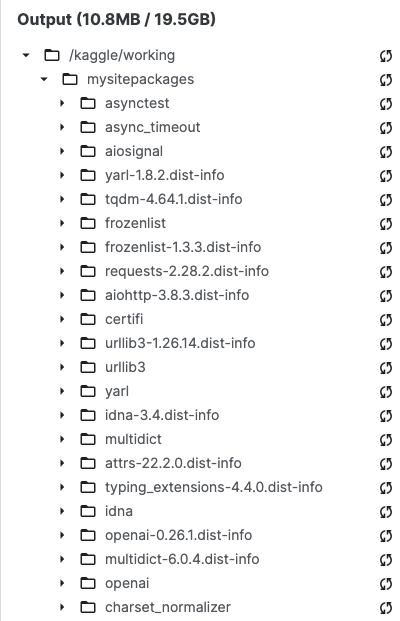
You can do the same for gpsread and oauth2client (which we’ll need to initialize the Google Sheet connection).
!pip install gspread --target=/kaggle/working/mysitepackages
!pip install oauth2client --target=/kaggle/working/mysitepackages
After the installation of openai, gpsread and oauth2client in a persistent way, you can safely delete the cell (TIP: by pressing dd while on the highlighted cell) and insert the following code into the first cell, which will connect your notebook to mysitepackages, as well as the import commands for the packages.
import sys
sys.path.append('/kaggle/working/mysitepackages')

import openai
import gspread
from oauth2client.service_account import ServiceAccountCredentials
How to use your OpenAI API key in Kaggle?
Next we need to safely store our OpenAI API Key in Kaggle.
In the ADD-ONS tab of the menu, you’ll find the SECRETS section.
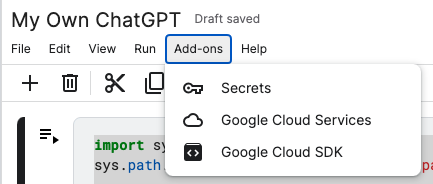
Simply add your OpenAI API Key by giving it a label, such as openaikey. Let’s keep things simple 🙂
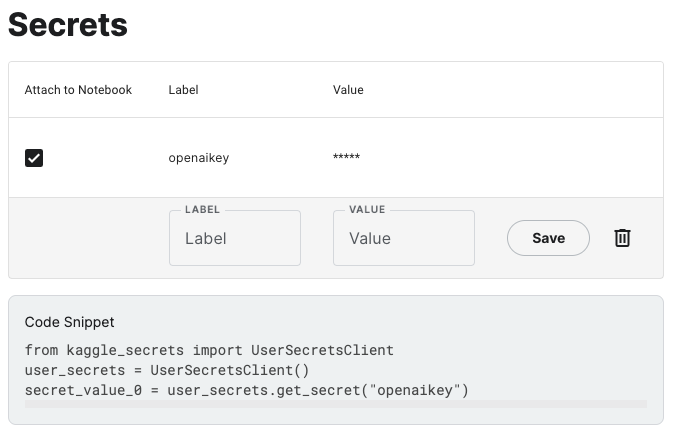
Copy paste the code snippet at the bottom of the screen and add it to the first cell of your notebook. Also import time, os and json.
This will be the final content of your first cell.
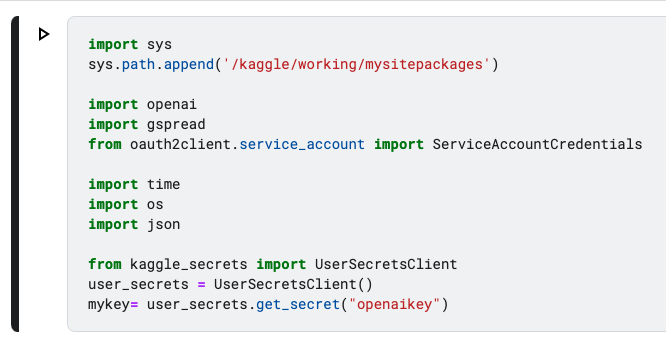
In the second cell, we’ll connect to the Google Sheets API.
You’ll notice “creds.json” in my code. That’s the name I gave to the JSON file containing my Google Developer Account private key. I uploaded this file via the Kaggle side panel.
👉 In my article dedicated to Python + Google Sheet, you’ll find the detailed tutorial to create your own creds.json file.
scope = ['https://spreadsheets.google.com/feeds','https://www.googleapis.com/auth/drive']
with open('/kaggle/input/credsjson/creds.json', 'r') as f:
    creds = json.load(f)
credentials = ServiceAccountCredentials.from_json_keyfile_dict(creds, scope)
gc = gspread.authorize(credentials)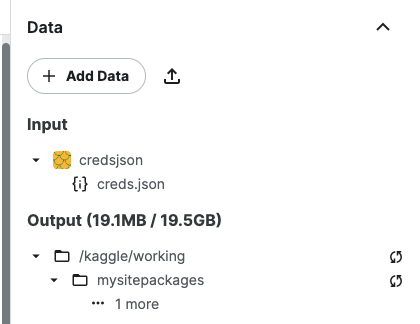
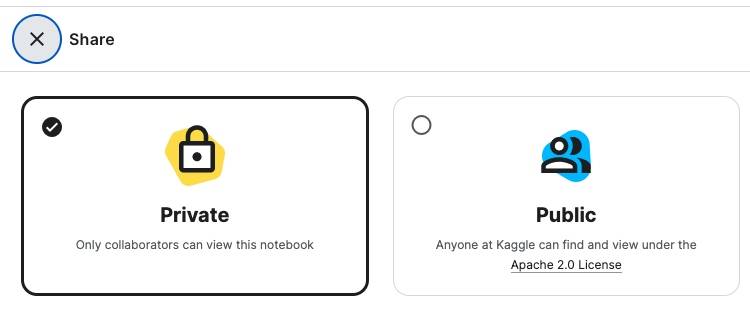
👉 It’s a good moment to remind you to check that your Kaggle Notebook is PRIVATE (that’s the default setting).
In the next cell of your notebook, create a function to use OpenAI in Kaggle. You can fine tune the parameters (max_tokens, etc.) by following the recommendations of OpenAI.
def question(prompt, variable):

  openai.api_key = mykey

  response = openai.Completion.create(
    model="text-davinci-003",
    prompt= f"{prompt} {topic}?",
    temperature=0.7,
    max_tokens=256,
    top_p=1,
    frequency_penalty=0,
    presence_penalty=0
  )

  answer = response["choices"][0]["text"]

  return answer
You can test that everything is working fine by running this code in your next cell.
prompt = "Who is the president of"
variable = "France"

AI_answer = question(prompt, variable)

print(AI_answer)
It should print out (at time of writing): The current president of France is Emmanuel Macron.
Now we’ll connect the Kaggle notebook to our Google Sheet. Python Connect is here the name of my demo sheet.
More info about connecting Python to Google Sheet in my detailed article.
sh = gc.open("Python Connect").sheet1Now you can iterate on the rows of your sheet to ask a series of questions to GPT-3 via the OpenAI API.
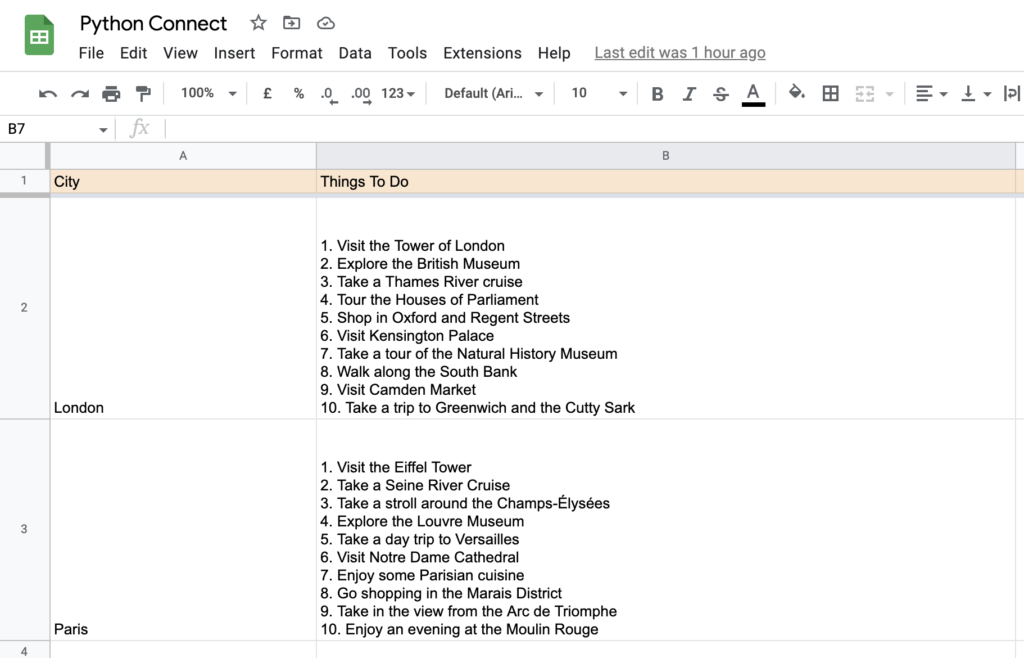
Let’s say for instance that you want to get a list of Things To Do in a particular city. And you have 2 cities in your sheet, located in cells A2 and A3, London and Paris.
print("Let's Go! ")

#row = the first row of my list of variables - limit = the last row of variables

row = 2
limit = 3

prompt = "List 10 things to do in "

while row <= limit:

    city = sh.acell(f"a{row}").value

    activities = question(prompt, city)

    sh.update(f"b{row}", activities)

    print(f"Row {row}, done.")

    row += 1
    time.sleep(0.3)
The answers will be published in a snap in column B.
This is what the output will look like.
You can ask further questions related to the same cities and insert the answers in other columns.
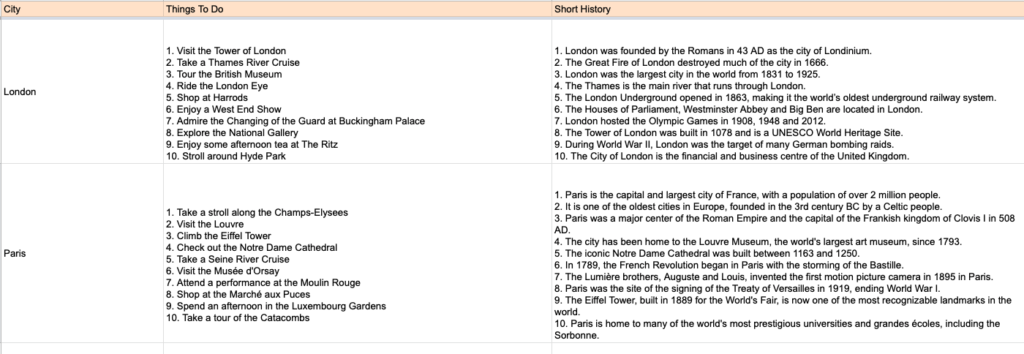
For instance, let’s add a question to list key historical facts about each of those cities.
print("Let's Go! ")

row = 2
limit = 3

prompt = "List 10 things to do in "
prompt2 = "List 10 key historical facts about the following city "
prompt3 = "Write a short presentation paragraph based on those historical facts "

while row <= limit:

    city = sh.acell(f"a{row}").value
    activities = question(prompt, city)
    history = question(prompt2, city)

    sh.update(f"b{row}", activities)
    sh.update(f"c{row}", history)

    print(f"Row {row}, done.")

    row += 1
    time.sleep(0.3)
Here’s a potential output (if we don’t comment out the “activities” question, GPT-3 will override the first suggestions).
Now, let’s imagine that you want to write a short marketing presentation based on the historical facts but without re-running the script for the Things To Do and Short History columns.
You’ll simply add a prompt to the same cell, comment out the 2 initial questions, declare the history value based on the content inserted in column C, and rerun the cell, like this:
print("Let's Go! ")

row = 2
limit = 3

prompt = "List 10 things to do in "
prompt2 = "List 10 key historical facts about the following city "
prompt3 = "Write a short presentation paragraph based on those historical facts "

while row <= limit:

    city = sh.acell(f"a{row}").value
    #activities = question(prompt, city)
    #history = question(prompt2, city)
    history = sh.acell(f"c{row}").value
    presentation = question(prompt3, history)

    #sh.update(f"b{row}", activities)
    #sh.update(f"c{row}", history)
    sh.update(f"d{row}", presentation)

    print(f"Row {row}, done.")

    row += 1
    time.sleep(0.3)
Which gives us the following output for London and Paris
London is a city with a rich and vibrant history, having been founded by the Romans in 43 AD as Londinium. It has served as the capital of England since 1066, and the River Thames has been a vital trade route for centuries. London was the site of the first Underground Railway in 1863 and the first public display of an electric light in 1879. In recent times, London has hosted the Olympic and Paralympic Games in 2012, and it is now the most-visited city in the world, home to more than 8 million people.Paris is a city of great historical importance, with a population of over 2 million people. It was founded in the 3rd century BC, and later became a major center of the Roman Empire. It is home to iconic landmarks such as the Louvre Museum, Notre Dame Cathedral, and the Eiffel Tower. The city has been the site of many significant events, such as the French Revolution and the signing of the Treaty of Versailles. It has also been home to some of the world's most prestigious universities and grandes écoles, including the Sorbonne.👏 Congratulations. You’ve just built your own ChatGPT on steroids using OpenAI, Google Sheets and Kaggle.
Be creative, have fun (and always check the facts suggested by the AI)!
If you need any help to create your scenarios, feel free to contact me.

 Subscribe to my weekly newsletter packed with tips & tricks around AI, SEO, coding and smart automations