Despite the tremendous advances in the no-code scene, I’ve been noticing an interesting trend: more and more people want to start using Python to enhance their automation skills.
I’ve already published a few tutorials explaining how to connect Python to Google Sheets or to WordPress but I thought it would be worth spending some time outlining the very first steps for any beginner.
I’m a Mac user so this tutorial will be solely focused on the options available on Apple computers.
My recommendation is to understand both how to use Python on your local machine AND in a cloud-based environment (Google Colab, Kaggle, Replit,…).
How to install & run Python on your Mac
Before picking a software to code Python scripts on your Mac, you need to install Python.
It’s very easy, just go to python.org/downloads and download the latest version.
Follow the installation steps. It’s pretty straightforward and shouldn’t more than a few minutes.
Then you’ll need an IDE (Integrated Development Environment) to edit Python code on your local machine. The Youtube tutorial I followed to kickstart my programming journey suggested PyCharm so that’s the one I picked. The community edition is free. You can download the Mac version via this link.
You could also use Visual Studio Basic, the popular free IDE offered by Microsoft but for the purpose of this tutorial, we’ll stick to my personal configuration, i.e. PyCharm.
Download the latest version of PyCharm and follow the installation instructions.
On the validation screens, keep the “Do Not Import Settings” choice and in the end the default choice for first time users.
When PyCharm is installed on your computer, you’ll have to create your first project.
How to create your first project in PyCharm
The first thing you need to do is make sure than you have the correct Python interpreter associated with your new project. Expand the Python Interpreter section and pick for the Base interpreter the latest version of Python previously installed on your computer.

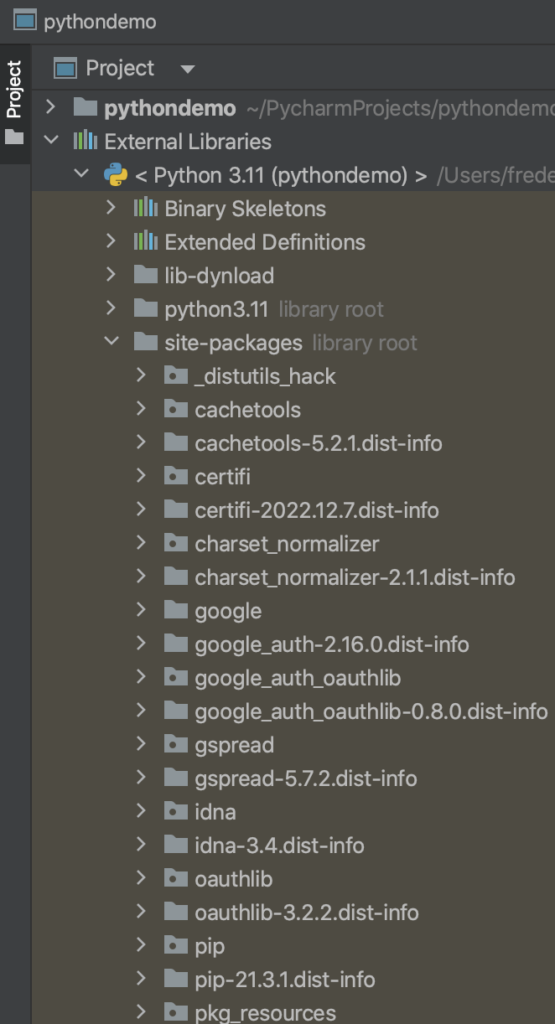
When you open your brand new PyCharm project, if you expand the External Libraries folder in the side panel and then expand the site-packages folder you won’t see a lot of packages by default. That’s perfectly fine.
In Python, a package is a collection of modules that are bundled together in a single directory hierarchy. Packages can be used to organize code and related resources, and to make it easier to reuse and share code between different projects. A package may contain subpackages and modules, and can also include other resources, such as data files or documentation. Python’s built-in import statement can be used to import modules from a package.
Basically you’ll use packages to quickly add functions to your Python scripts.
The cool thing about PyCharm is that you don’t need to run “pip install” commands in Terminal to add new packages to your virtual environment. You simply head to the Python Packages section via the bottom bar and search for packages then click on Install to add the package to the Site-packages folder.
See for instance how to install gspread, which I use to connect Python to Google Sheets.
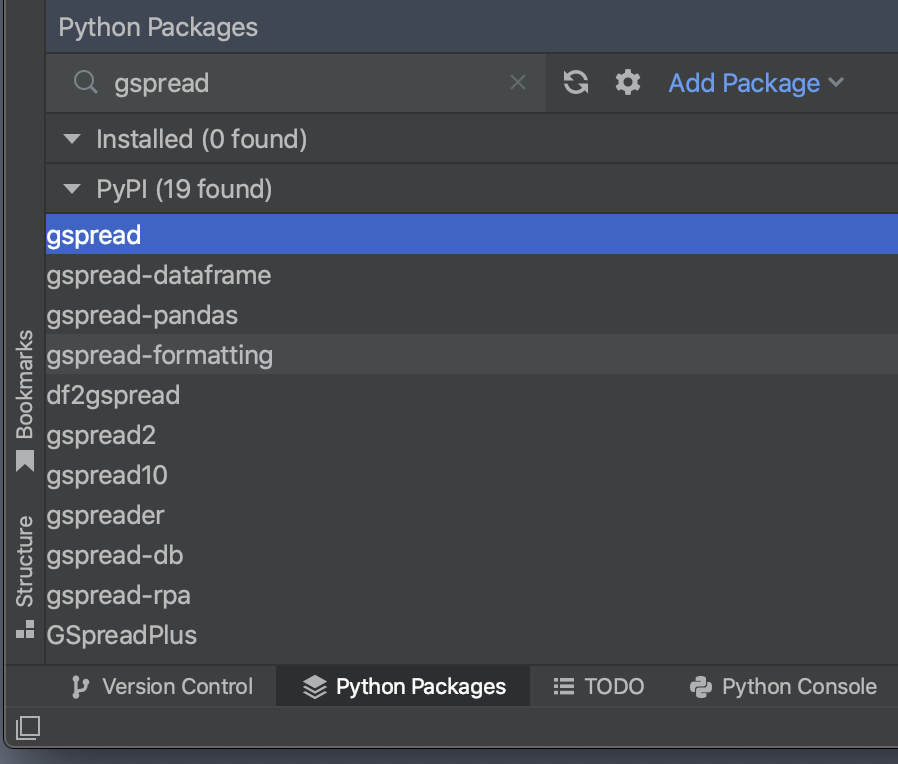

Note: you might have to close & reopen your project to actually see the new package(s) installed in. the site-packages folder but don’t worry, once they’re installed, they’re available.
As you can see from the screenshot below, installing gspread also installed a series of other packages (dependencies) necessary to run gspread (google, google_auth, etc.)
How to create your first Python file in PyCharm
Inside of your project, click on the project demo folder, then right click to open the dialog and choose New > Python file (which will have a .py extension).
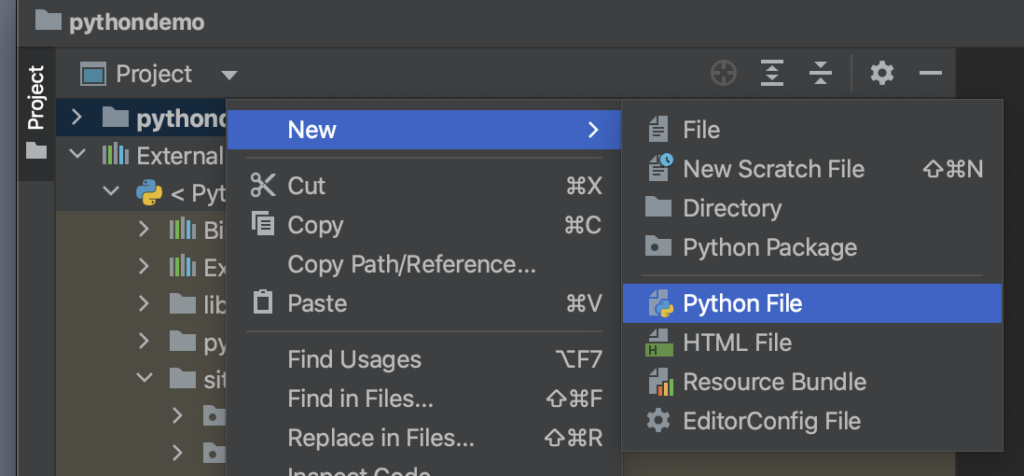
Minimize the External Libraries folder to have a clean workspace in your side panel.
I called my demo Python file “my first script”.

Now you’re good to go, you can start coding in the editor window on the right.
You could for instance try to print out the traditional “Hello World” used in all programming demos.
print("Hello World")You can run this one-line programme by clicking on the green arrow in the top right corner.
You’ll notice a drop down where you can choose which Python script you want to run. When you’ll have multiple .py files in your project, this will come handy.
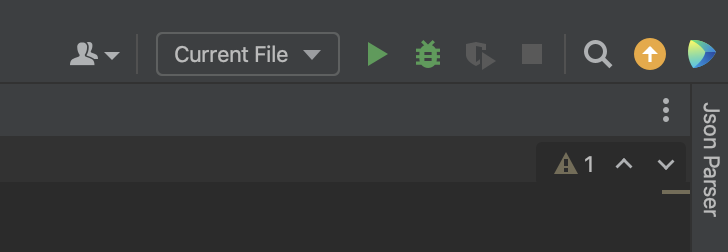
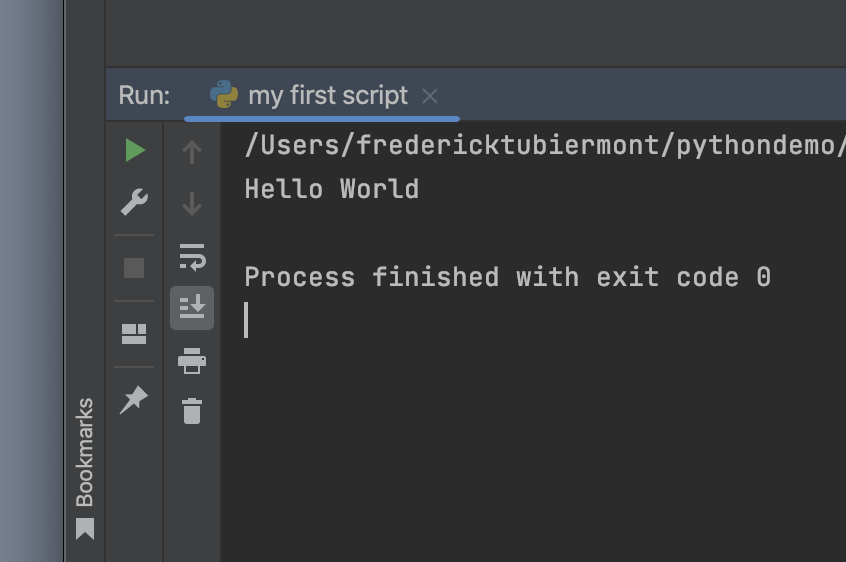
You’ll notice that pressing the green arrow will open a new window at the bottom of PyCharm, called the Console.
As expected it will display Hello World.
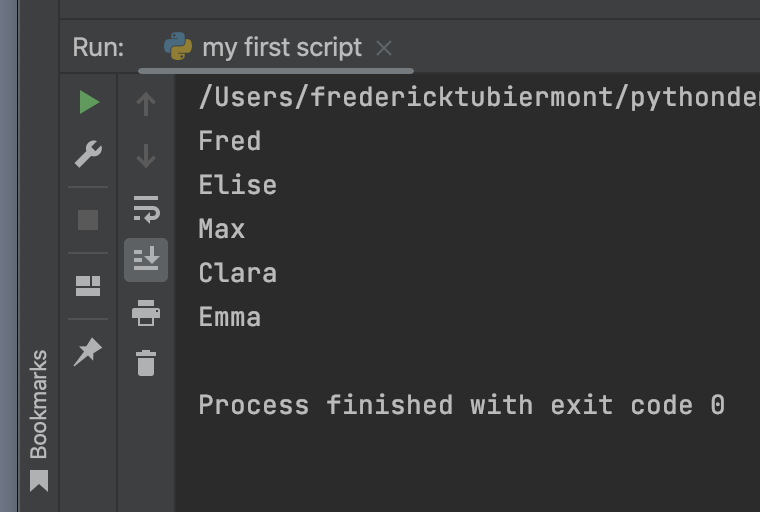
Let’s create a basic list (items listed between “” inside square brackets) and a for loop iterating through that list and see what happens in the console.
list = ["Fred", "Elise", "Max", "Clara", "Emma"]

for i in list:

    print(i)
It will print out all the values from the list, then exit.
How to run Python in a Jupyter notebook
PyCharm or any other similar IDE is great to run Python scripts from start to finish.
But sometimes you want to test every step of a script before running it in your IDE or you might also use Python for data science purposes, where you need a sequential view on the output generated by each step of your script, incl. graphs and other data representations.
In order to see the result of each step, you should use a Jupyter notebook.
👉 You’ll notice that notebooks have a .ipynb file extension (whereas Python files end in .py).
You can either initialize those notebooks on your local machine or in the cloud via a hosted solution like Google Colab or Kaggle. The great thing about Google Colab is that you don’t have to install anything on your local computer and you can work from multiple devices. Kaggle offers access to thousands of public datasets.
Let’s first install Jupyter on our Mac via PyCharm.
Search for jupyterlab via the Python Packages library section and install JupyterLab. It will take a bit longer than other packages. When done, you should see the success message at the bottom right of the screen.


To open a brand new Jupyter notebook, click on Terminal in the bottom bar of PyCharm.
This will open a Mac Terminal window inside of PyCharm. You can switch between the RUN window(s) and TERMINAL via the bottom bar.
Inside the Terminal, type the following command: jupyter lab.
After a few seconds, this will open a new window in your default browser (Chrome for me), which will look like this.
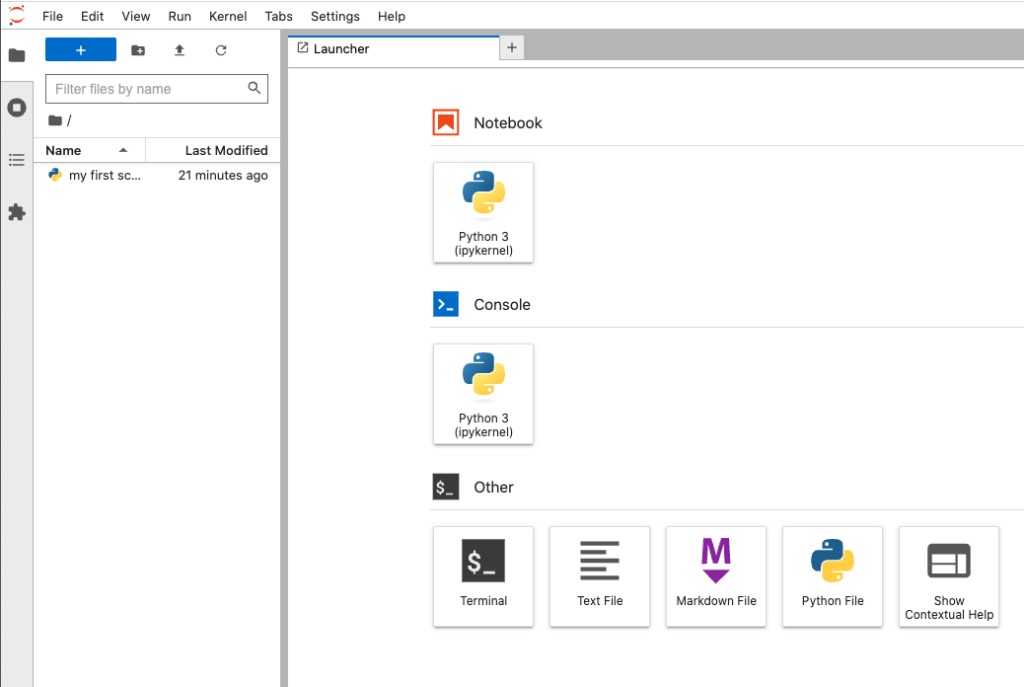
It’s important to know that your Jupyter Lab configuration will be able to leverage all the packages installed via PyCharm. So for instance I could start using gspread in a notebook since I’ve just installed it in my demo project. But let’s simply reproduce what we did in PyCharm in a notebook.
Click on Python3 in Notebook to create a brand new Jupyter notebook.
By default it will be called untitled.ipynb
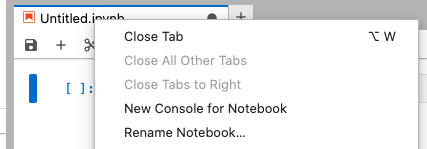
You can right click on the file name to change it. We’ll call it “first notebook”.
Then, in the empty cell, we’ll simply type in our first instruction.
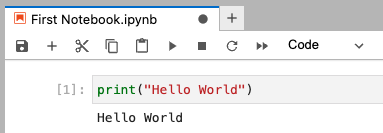
print("Hello World")Move the cursor of your mouse to the cell, press SHIFT – ENTER to run the code inside this cell.
It will print out the result just below the cell, like this.
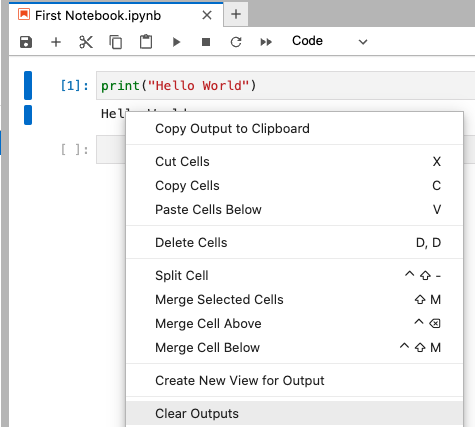
You can right click on the active cell and select Clear Outputs, then re-run the script.
Let’s type our second instruction in the next cell, then press SHIFT – ENTER on the active cell to run the script.
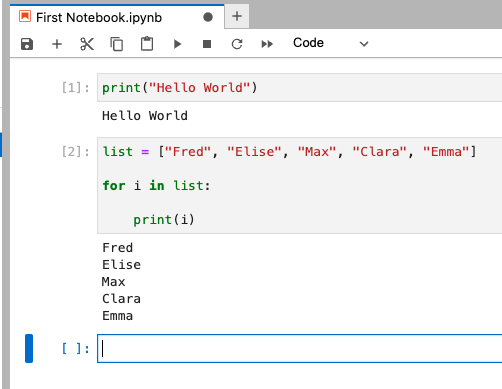
As you see you can run each cell independently, which helps you build a more sophisticated script.
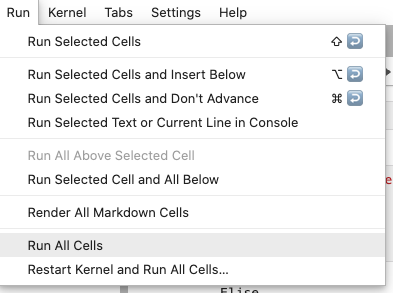
You can also clear all the outputs and run the whole notebook from start to finish via the Run All Cells command in the Run menu.
If you’re using Google Colab, this is how the same two instructions and their outputs will look like.
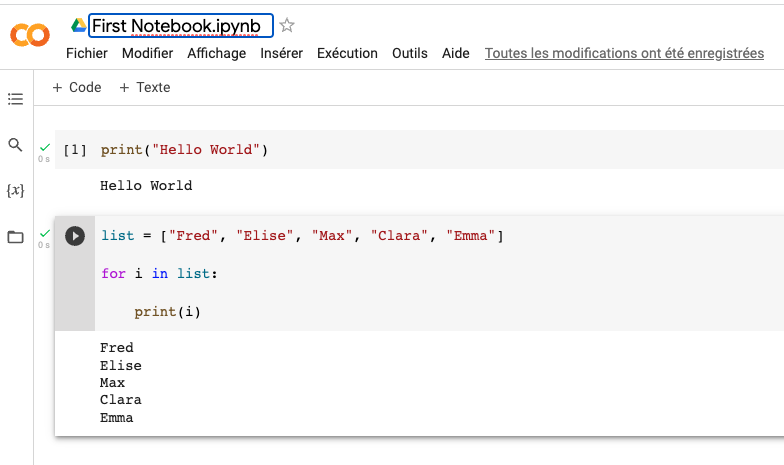
You’ve noticed the PLAY button on the active cell. You simply have to press it to run the script inside the cell (as we did with SHIFT-ENTER in the local Jupyter notebook).
If you need to install packages in Google Colab, simply type in a cell the pip command preceded by an exclamation mark (!), then run the cell. It will install the package. Here’s the example to install gspread.
! pip install gspread
That’s it for notebooks.
Let’s finish this tutorial with a quick introduction to Replit, a great hosted solution to edit and run your code in the cloud.
How to run Python in Replit
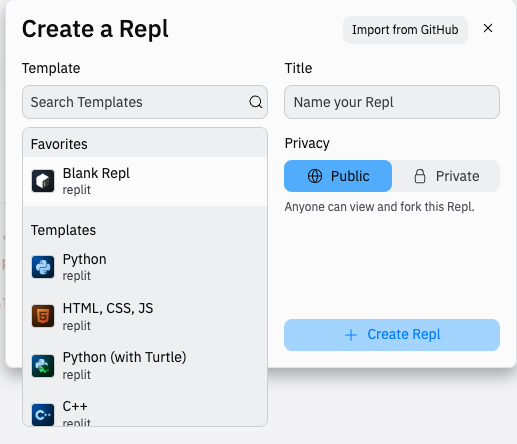
Projects in Replit are called Repl.
Replit isn’t limited to Python code. You can also create projects in HTML/CSS/JS, NodeJS, Ruby, etc.
Replit offers a built-in package manager, which you can use to install third-party packages, just as we did in PyCharm. The package manager is available via the Tools section in the side panel of your Repl.
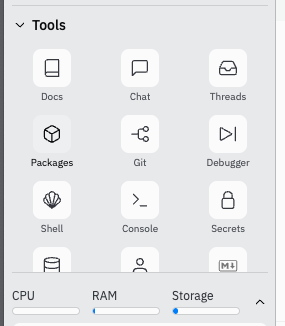
Projects can be either Public or Private. I use Repl to run some of my heavier Python scripts in the cloud, in private mode. I also use Replit to create demo scripts which I can easily share in the Community section.
See for instance this Repl explaining Object Oriented Programming via Python classes.
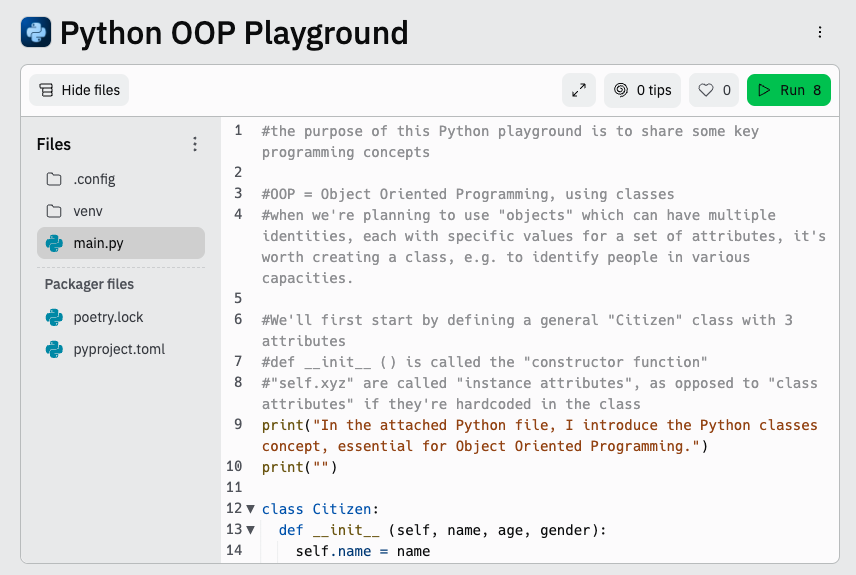
You can run it then see the underlying code in the files panel.
That’s All Folks!
I hope that this detailed tutorial has helped you to install & run Python on your Mac.
Have fun coding in Python!


 Subscribe to my weekly newsletter packed with tips & tricks around AI, SEO, coding and smart automations