You know the importance of having a nice featured image for your WordPress posts. That’s how those articles will be previewed on social media and it’s also a smart way to get traffic from Google Images.
You can create dynamic images with SaaS such as Bannerbear, which does a great job in offering you no-code templates which you can feed with data using Zapier, Make or other automation tools.
But of course such a service has a cost. In the case of Bannerbear, it’s $49 per month for 1,000 image credits.
What if you could generate unlimited dynamic images for free? Wouldn’t it be great? That’s what we’ll learn together today.
By the end of this article, you’ll be able to create your own images using the code I will provide, either locally or in the cloud.
1° Install WP Webhooks plugin on your WordPress site
In order to send data to a webhook after each publication, you need to declare the webhook URL on your WorPress site. I advise you to use WP Webhooks, which will also enable you to secure the connection with your automation server.
After installation, you’ll find WP Webhooks via the SETTINGS section in the sidebar.
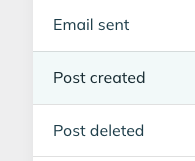
Go to SEND DATA in the Top Bar and then POST CREATED.
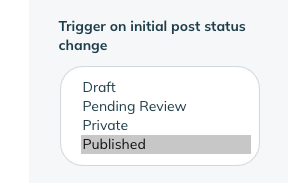
Make sure to pick PUBLISHED (and not DRAFT) in the options. Otherwise the webhook will be triggered as soon as you start a new post in draft mode.
Simply enter the URL of your webhook in the first field. I’ll show you in a moment how to create the webhook automation. For the purpose of this demo, my URL on Replit is https://Flask-Server.callmedred.repl.co/my_webhook This is where WordPress will send the data when a new post is published.
Since I don’t want the whole world to flood my automation scenario with requests, I secured the access via a Bearer token. You can create it via the Authentication section of the plugin.

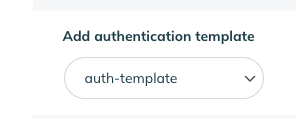
Don’t forget to select the template in the SETTINGS of your webhook (if you first declare the webhook, as I did, and then create the authentication template, you’ll have to come back to the webhook settings to select it).
You’ll understand in a moment how we use this Bearer token.
That’s it for WordPress, now let’s go to Replit to code our automation scenario. It’s gonna be fun!
2° Start a Flask Server to create a webhook
I already wrote a detailed tutorial explaining how to connect Python to WordPress.
I invite you to read it carefully to understand the basic principles of authentication, i.e. how to create the credentials which enable you to connect to the WP REST API to publish media and create / update posts.
For the purpose of this demo, I’ll use Replit.com to run a (Python) Flask server in the cloud which will create a webhook which will be the pivot of our automation.
👨💻 We will ping the webhook when a new post is created to generate a dynamic image based on the title. Then we’ll upload the image to our WordPress library, we’ll retrieve the ID of the uploaded image and we’ll attach this media as a featured image to our newly created post.

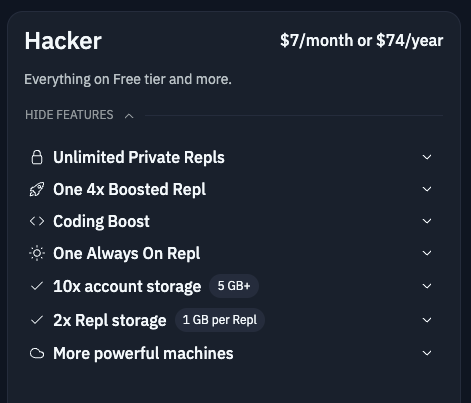
The cool thing about Replit (if you’re a premium user, which costs $74 per year) is that you can set your Repl (Replit project) to stay ALWAYS ON. So as soon as you’ve started the Flask web server, it will constantly listen to any incoming POST requests from your WordPress site. You get one Always On Repl with the Hacker Plan, which is Replit’s basic premium plan. If you’re a Business user, you can have up to 5 Always On Repls. You can still use the code as a free user but you’ll need to manually start your Flask server when you need it.
Local Server Alternative
All the code that I will be sharing with you today can also be run locally using Pycharm or another Python IDE.
But then you’ll need a solution to connect your local web server to the internet in order to make it available to your WordPress site. It’s a great skill to learn for other purposes.
You can do this with ngrok.com. You simply have to download and unzip the ngrok executable file, move it (on Mac) to /usr/local/bin (that’s VERY important. Do not leave the file on your deskop, in your downloads or in your applications folder, it won’t work), run the authentication command (you’ll get it after signing up) and, depending on the port that you’ve declared in your flask code, run a quick command to create a tunnel leading to your localhost.
For instance if in my Flask code I declare the port as 5000, I’ll run ngrok http 5000 in my Terminal and ngrok will create a “tunnel”. I can then use the ngrok tunnel URL to access my local server.
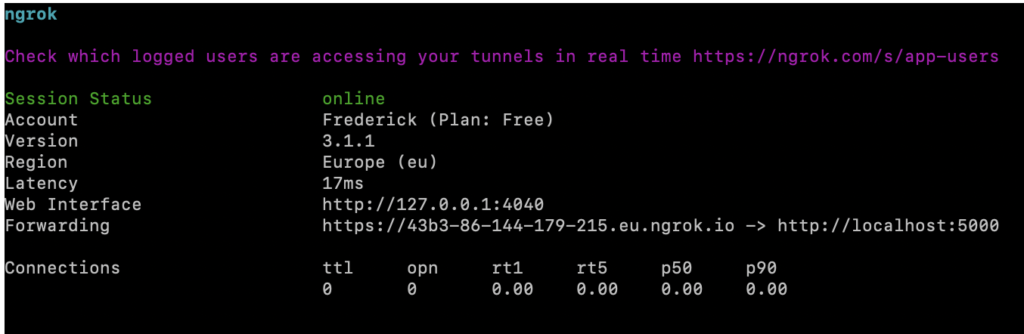
In the FREE PLAN of NGROK, the forwarding URLs are temporary.
You can use this approach if you know that you’re about to create a POST or if you plan to rely on this integration for a specific automation, for instance to generate a series of new images for some of your older posts.
The Always On Replit approach is much more convenient. And, as you will see, I’ve added a layer of security to the webhook, via a Bearer token. The Flask server will only accept POST requests bearing that token. Other attempts will get a 302 error.
OK, so let’s get our hands dirty and code the main.py file of our Repl.
import os
from flask import Flask, request, redirect

from featured_image import create_image

from wordpress_media import postmedia
from wordpress import wordpress_header
from wordpress import update_wordpress_post

#WP authentication
wp_user = os.environ['wp_user']
wp_pw = os.environ['wp_pw']

wordpress_header = wordpress_header(wp_user, wp_pw)[0]
wordpress_auth_media = wordpress_header(wp_user, wp_pw)[1]

#webhook security
ALLOWED_TOKEN = os.environ['ALLOWED_TOKEN']

#Create a webhhook via Flask server
from flask import Flask, request, Response
app = Flask(__name__)

@app.route('/my_webhook', methods=['POST'])
def process_data():

    if request.headers.get("Authorization") != ALLOWED_TOKEN:
        return redirect("")

    #getting the data received by the webhook
    data = request.json
    #get post ID
    post_id = data["post_id"]
    #get post title
    post_title = data["post"]["post_title"]

    #STEP 1 create featured image
    image = create_image(post_title)
    #STEP 2 post the image to WP Media
    image_id = postmedia("callmefred.com", f"featured/{post_title}_featured.jpg", post_title, wordpress_auth_media)

    #STEP 3 update WP post

    update_wordpress_post("callmefred.com", post_id, image_id, wordpress_header)

    print("The featured image has been updated, all done!")

    return "All Good"

if __name__ == '__main__':
  app.run(host='0.0.0.0', port=5000)
There’s quite a lot to digest here.
You’ve noticed that I import os.
This enables me to access the SECRETS section of Repl where I store the wp_user, wp_pw (password) and the bearer token to secure access to the server.
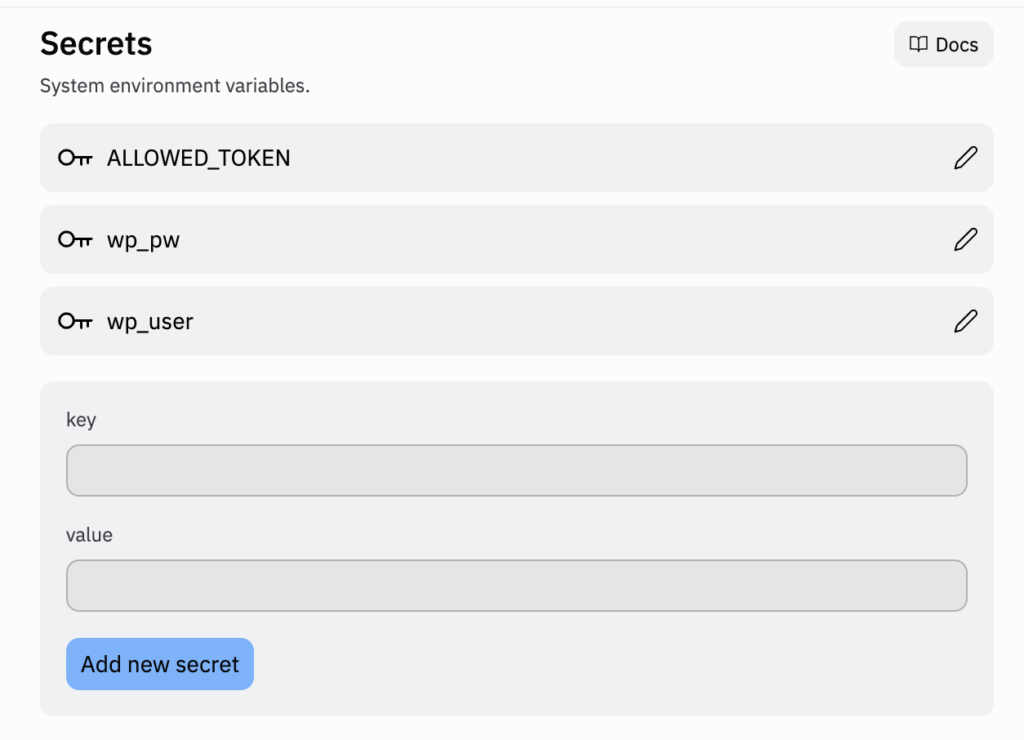
Those variables are then simply accessed this way
wp_user = os.environ['wp_user']
wp_pw = os.environ['wp_pw']
ALLOWED_TOKEN = os.environ['ALLOWED_TOKEN']
You’ve also noticed that I import some functions from other Python files created in my Repl: featured_image, wordpress_media and wordpress.
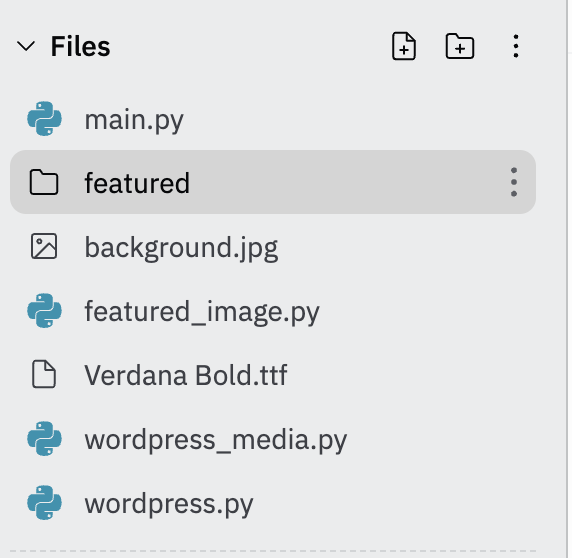
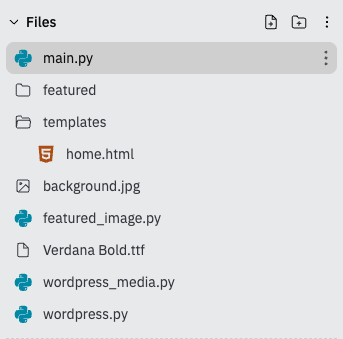
I’ll give you the full code for those files in a moment but first take a look at what my Files section looks like in the side panel. The featured folder will host my featured images. The Verdana Bold font is the one we’ll use in our creative and the background image is the base layer for the featured image.
Circling back to my main.py file detailed above, you’ve also noticed the 2 lines securing access to the wehbook.
def return_response():
    if request.headers.get("Authorization") != ALLOWED_TOKEN:
        return redirect("")
👉 The webhook itself is created at “/my_webhook“.
My Repl is private but I can access it via https://Flask-Server.callmedred.repl.co (Note: I will put this Repl to sleep after finishing my article).
So the webhook itself is located at https://Flask-Server.callmedred.repl.co/my_webhook. Since we don’t have any route declared for the home page, when I RUN the server, I get this “error” in the Webview panel.

That’s perfectly fine since I don’t need anything on the home page. I just need the /my_webhook route to be functional.
You’ve also noticed how I retrieved the data received by the webhook.
    #getting the data received by the webhook
    data = request.json
    #get post ID
    post_id = data["post_id"]
    #get post title
    post_title = data["post"]["post_title"]
Then we have the actions performed to create the featured image, upload it to WordPress and attach it to the newly created POST.
And I closed the function simply returning “All Good” (you have to return something at the end of the function, otherwise you’ll get an error).
3° Create your featured_image.py file
This file will use the Pillow (PIL) package to generate a dynamic image based on the title of the WordPress post.
Here’s the full code for the file.
from PIL import Image
from PIL import ImageFont
from PIL import ImageDraw

import textwrap

def create_image(text):

    W = 1200
    H = 628

    # initialize image
    featured_image = Image.open("background.jpg")
    # resize image to expected size
    featured_image = featured_image.resize((W, H))

    # set font
    font1 = ImageFont.truetype("Verdana Bold.ttf", 50)

    # initialize the layering process
    draw = ImageDraw.Draw(featured_image)

    # wrap the title if too long

    wrapper = textwrap.TextWrapper(width=20)
    word_list = wrapper.wrap(text=text)
    line1_new = ''
    for ii in word_list[:-1]:
        line1_new = line1_new + ii + '\n'
    line1_new += word_list[-1]

    # add the title to the image

    position = (175, 100)
    draw = ImageDraw.Draw(featured_image)
    draw.text(position, line1_new, font=font1, fill="white")

    #save the image
    featured_image.save(f"featured/{text}_featured.jpg")

    return featured_image
I’m using textwrap to write the title on multiple lines if it’s too long for one single line.
The max width per line is measured in characters, incl. white spaces (here 20 characters).
I’ve chosen a size of 50 pixels for the Verdana Bold font, which I had uploaded in my Files section.
The background of my image (backgroung.jpg) was created in Canva.

Tip: adding my logo straight away to the background layer spares me the effort of adding a few lines of code to paste the logo onto the background via Pillow.
In this example I simply write the title on the background but you could add extra layers of customization, for instance paste a thumbnail on the right hand side of the background, add multiple data-driven text areas, a dynamic icon, etc.
Each time you add an element (text or image) to the background layer, you have to set the position of the element.
In today’s example, my title will start at 175 pixels right on the X axis and 100 pixels down on the Y axis. You can play with those numbers depending on the configuration (and size) of your background image.
You can also start from scratch and generate a background layer without using an existing image. I invite you to check out the Pillow documentation for more details.
4° Create your Worpress_media.py file
In our wordPress_media.py file, we’ll simply create the function which handles the upload of the featured image to our WordPress media library.
import requests

def postmedia (url, media, filename, wordpress_auth_media):

  Headers =  {
      'Authorization': f'Basic {wordpress_auth_media}',
      "Content-Disposition": f"attachment; filename={filename}.jpg",
      'Content-Type': 'multipart/form-data',
      'Cache-Control' : 'no-cache'
              }
  #print(Headers)

  api_url = f"https://{url}" + "/wp-json/wp/v2/media/"

  mediaImageBytes = open(media, 'rb').read()

  response = requests.post(api_url, headers=Headers, data=mediaImageBytes)

  results = response.json()

  #print(results)

  return results["id"]
We pass the following 4 variables into the function ( ):
- the root domain of our site (url)
- the media file (expressed by its path location after creation, in our case in the featured folder)
- the file name (which in our case is the post title)
- and the authentication token generated via a function called in main.py from our wordpress.py file
In the end we return the “id” which we’ll need to update the featured image of our WordPress post.
If you remember our main.py file, this is the way we call the postmedia function in our workflow to get the image_id.
image_id = postmedia("callmefred.com", f"featured/{post_title}_featured.jpg", post_title, wordpress_auth_media)5° Create your wordpress.py file
In our wordpress.py file, we take care of the authentication to the WordPress API, both to upload the featured image and update our post (the 2 methods are slightly different but managed via a single function, returning 2 results which we can access via the [0] and [1] indexes, as demonstrated in our main.py file).
wordpress_header = wordpress_header(wp_user, wp_pw)[0]
wordpress_auth_media = wordpress_header(wp_user, wp_pw)[1]
import requests
import base64
def wordpress_header(wp_user, wp_pw):
wordpress_user = wp_user
wordpress_password = wp_pw
wordpress_credentials = wordpress_user + ":" + wordpress_password
wordpress_token = base64.b64encode(wordpress_credentials.encode())
wordpress_header = {'Authorization': 'Basic ' + wordpress_token.decode('utf-8')}
wordpress_auth = wordpress_token.decode('utf-8')
return wordpress_header, wordpress_auth
def update_wordpress_post(url, id, image_id, wordpress_header):
api_url = f'https://{url}/wp-json/wp/v2/posts/{id}'
# data structure of the custom post typen, in JSON
data = {
"featured_media": image_id
}
response = requests.post(api_url, headers=wordpress_header, json=data)
results = response.json()To generate the wordpress header data, we pass both the wp_user and wp_pw variables.
To update the post, we pass the url of our site, the id of the post (which we initially got from the webhook, the image_id and the wordpress_header which is structured in a slighly different way than the wordpress_auth we used for the postmedia function).
Note: we don’t return any response from the API after updating the post.
6° Enjoy the pleasure of automation
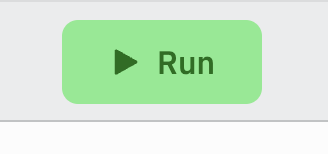
Let’s press on the green RUN button in Replit.
It starts my Flask server.
Here’s what I see in the console.
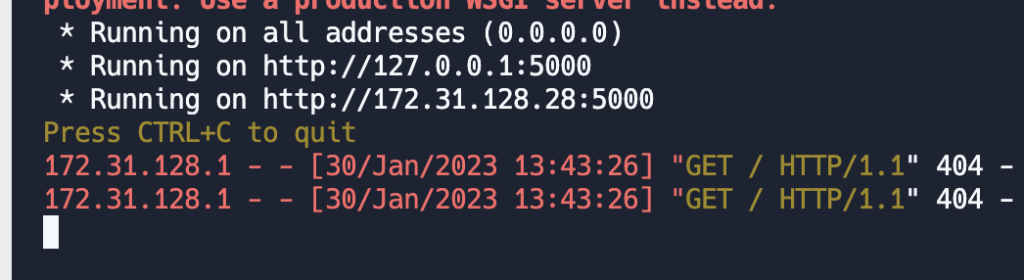
Don’t worry about the 404, it’s just the Webview attempting to access the home page of the Repl.
If you want to avoid this benign 404 error, caused by the absence of a proper “home page” for your Flask application, you can simply add another route which executes a simple HTML file, this way:
@app.route('/')
def home():
    return render_template('home.html')

#just before the rest of the code provided above
@app.route('/my_webhook', methods=['POST'])
def process_data(): ...
Then you need to create a TEMPLATES directory in the Files section and create a home.html file inside that directory.
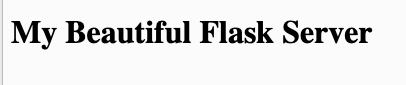
You can write whatever you want in your home.html file, for instance:
<h1>My Beautiful Flask Server</h1>Which will be rendered this way when you’ll RUN main.py
Hit PUBLISH!
Now that I’m ready to test my automation, here comes the magic…

I hit PUBLISH on this post… wait for a few seconds, and here’s what I see in the console of my Repl.

And if I open the post, I see my featured image.
Now if I leave my Repl “on” and publish other posts, I will get a free automatically generated dynamic featured image for each of them.
 Subscribe to my weekly newsletter packed with tips & tricks around AI, SEO, coding and smart automations