Adding a Facebook pixel to your website is an essential step to improve the efficiency of your Facebook ads. It will enable you to create custom audiences.
To be able to use the activity of your Facebook pixel to create a custom audience, you have first to assign an ad account to your Facebook pixel, via Business settings / Data Sources.
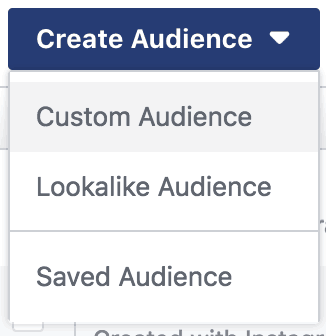
After assigning an ad account to your pixel, go to AUDIENCES in ASSETS.
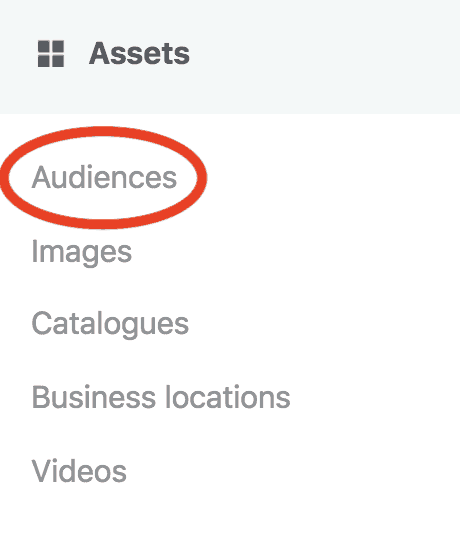
And select CUSTOM AUDIENCE.
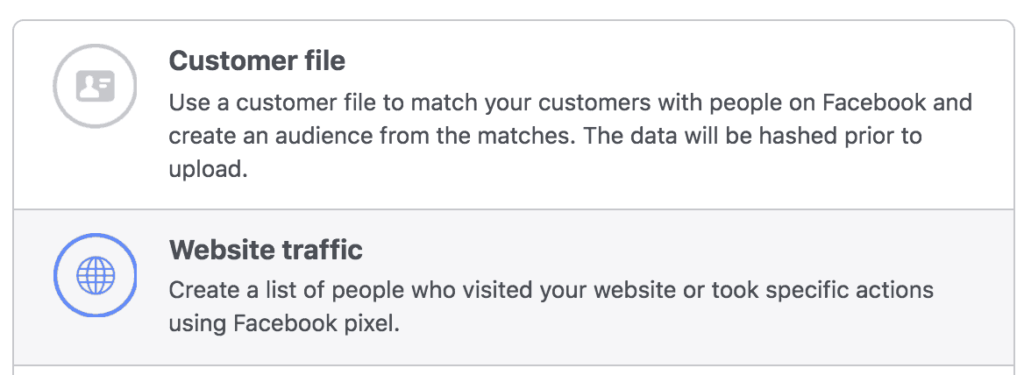
Then Website Traffic, which will enable you to select the pixel.
You can adapt the tracking period (I usually set it to 180 days, the maximum), name your pixel and create your audience. It will take a while to be populated by the activity of the pixel.
Note: instead of “all website visitors” you can also limit the audience to the users having visited a specific page.
Tip: create at least 2 different audiences, one encompassing all visitors and one for a specific page.
Important: create this custom audience as soon as possible after the integration of your first pixel, since you’ll need a few hundred visitors before being able to use your audience for advertising purposes.
You’ll be able to use pixel-driven custom audiences for retargeting purposes and also to create a lookalike audience (= people similar to your custom audience, cherry-picked by the Facebook algorithm in a target population).
Custom audiences can also be created from a list of optin emails (prospects / customers) which you can upload to Facebook, from the activity tracked in a native app or from the engagement on Facebook itself (people who have watched a video, interacted with your page or Instagram business profile, etc.).
We’ll explore these possibilities in further snack tips.
 Subscribe to my weekly newsletter packed with tips & tricks around AI, SEO, coding and smart automations